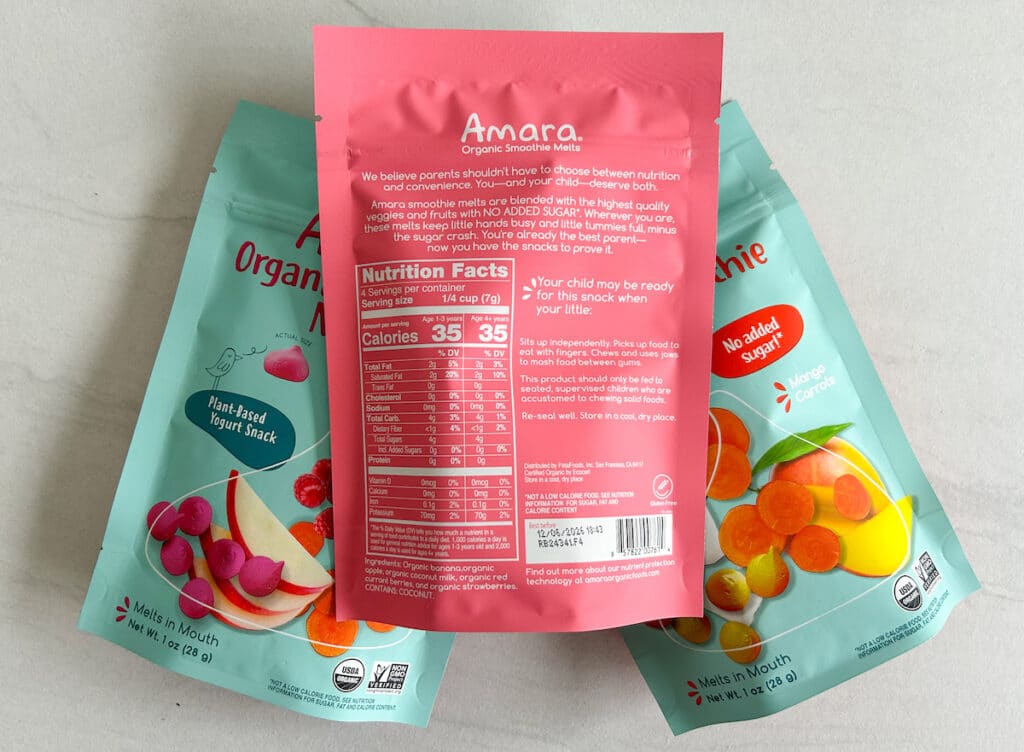
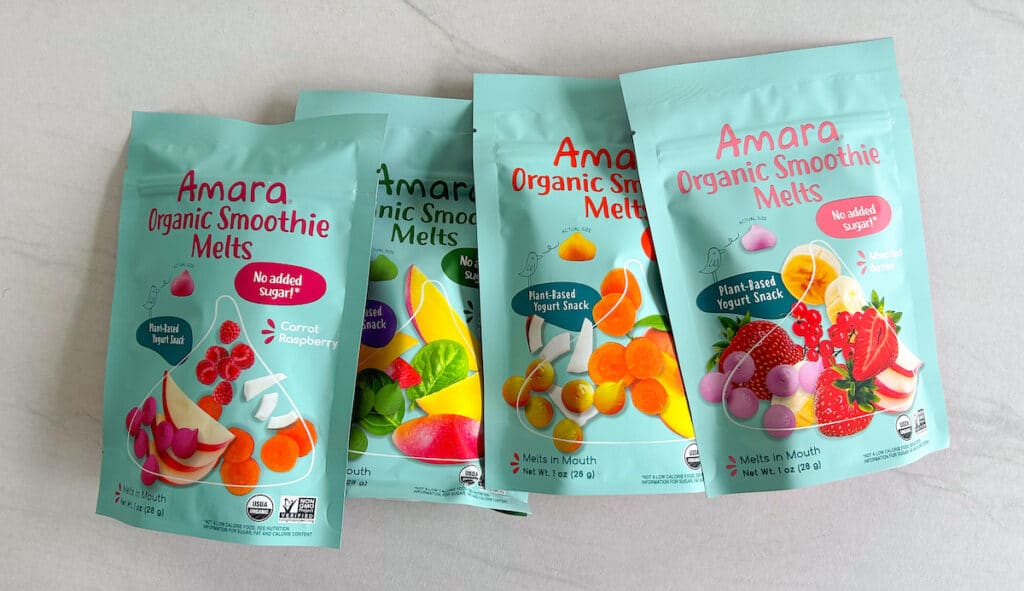
Smoothie melts are a simple, fuss-free snack that offers a great opportunity to sneak in extra nutrition – perfect for picky eaters and kiddos learning new textures! With the right brand, they can be packed with wholesome ingredients and great nutrition benefits.
As a pediatric dietitian, I want parents to feel confident in knowing how to choose the best snacks for their kids. That means knowing how to read an ingredient list and nutrition labels!
In this guide, I’ll break down the nutritional benefits of smoothie melts, how to select the healthiest options, easy homemade recipes, and my top recommended smoothie melt brand (with a great discount code!).
Nutritional Benefits of Smoothie Melts
Because smoothie melts are usually freeze-dried or frozen blended fruit, they bring all the nutrition of fruit in a different texture and format! As a dietitian, I find myself recommending smoothie melts often for these benefits:
Exposure to Fruits and Vegetables
For many kids, trying new fruits and vegetables can feel overwhelming due to the natural variety in taste and texture. Smoothie melts offer a consistent flavor and texture, making them a gentle introduction to fruits and veggies. Think of them as a gateway to a more diverse diet!
Fine Motor & Oral Motor Skill Development
Smoothie melts are an excellent transition food after purees or pouches. By around 9-10 months, babies develop a pincer grasp, allowing them to pick up smaller pieces of food with their pointer finger and thumb. It’s great practice for using this new skill!
The unique texture also encourages oral exploration, helping babies practice chewing and maneuvering food in their mouths—a crucial step in oral-motor development.
No Added Sugar
By choosing the right brand (see below), smoothie melts can be a fantastic low-sugar snack. This is a big win since it’s not easy to find convenient, on-the-go snacks for kids free from added sugar.
Store-bought vs. Homemade Smoothie Melts
Smoothie melts can be made at home or store-bought – each option has its own set of benefits and drawbacks. Let’s compare their nutritional value, cost, and convenience so you can decide what works best for your family.
Homemade Smoothie Melts
Pros
- Budget-friendly: Homemade options are typically less expensive than store-bought brands.
- Customizable: You can tailor the flavors and ingredients to your child’s specific preferences or dietary needs.
- Simple ingredients: They’re easy to make using yogurt, purees, or smoothies you already have at home.
Cons
- Melts quickly: Homemade smoothie melts tend to dissolve faster, making them less ideal for travel or lunchboxes. For me, this is the biggest drawback of the homemade version.
- Not portable: Because they’re temperature-sensitive, they don’t last more than 10 minutes outside of the freezer.
- Time-consuming: Although they are simple to make, the freeze time makes them a less than convenient snack option
Store-Bought Smoothie Melts
Pros
- Convenient: They’re ready to eat with no prep required
- Portable: Store-bought melts are perfect for on-the-go snacks and lunchboxes.
- Shelf-stable: Unlike homemade versions, they won’t melt or spoil easily.
- Nutrient-packed (depending on brand): Some smoothie melt brands offer great nutrition with no added sugar or artificial ingredients.
Cons
- Less customizable: Flavors are pre-determined, so they may not suit every child’s taste.
- Cost: Store-bought smoothie melts can be more expensive than making your own.
- Requires label reading: To ensure you’re getting a healthy product, you’ll need to carefully check the nutrition label and ingredients.
What to Look for In Store-Bought Smoothie Melts
When choosing store-bought smoothie melts, it’s key to read the nutrition label to make sure you’re getting the most out of your kid’s snack!
As a pediatric dietitian, here’s what I look for:
- No Added Sugar: Check the “added sugar” section on the label (not just “total sugar”). This ensures the sweetness comes solely from fruit, not added sweeteners.
- Minimal Ingredients: The ingredient list should be short, simple, and made up of items you can pronounce and recognize.
- Multiple Fruits and Vegetables: Because one of the benefits of smoothie melts is an increasing food variety, look for brands with multiple types of produce in each flavor.

Smoothie Melt Brand Recommendation
My top recommendation that checks all the boxes is Amara Smoothie Melts. They have a kid-approved naturally sweet flavor made with whole-food ingredients and no added sugar, Amara is organic, non-GMO, and use coconut milk which makes them naturally plant-based.
I love recommending Amara’s smoothie melts for a couple of reasons:
- Variety of Flavors: Each flavor contains 3–4 types of real fruits and vegetables, which means exposure to more foods, even for picky eaters.
- Natural Flavor Exposure: With no added sugar, your baby gets introduced to real, natural flavors instead of overly sweetened versions, which can prevent picky eating down the road.
- Perfect for Self-Feeding: The bite-sized pieces melt in your child’s mouth, making them ideal for kids who have developed the pincer grasp and are ready to start self-feeding.
- Convenient and Shelf-Stable: Amara’s smoothie melts are perfect for on-the-go because they’re shelf-stable! Easy to throw in your diaper bag or purse.

As a pediatric dietitian, I highly recommend Amara Smoothie Melts because they combine convenience and great ingredients—making them a win for kids and parents!
Plus, I have an awesome discount code! Use “LAURENRD” for 20% off!
How to Make Homemade Smoothie Melts
There are two simple ways to make smoothie melts at home: yogurt or a smoothie base.
Option 1: Yogurt-Based Smoothie Melts
- Mix full-fat yogurt with mashed fruit of your choice, or use your child’s favorite yogurt pouch.
- Spoon or pipe small dollops onto a parchment-lined baking tray.
- Freeze for 1–2 hours, or until completely solid.
Option 2: Smoothie-Based Smoothie Melts
- Blend your favorite smoothie recipe (if you need inspiration, here are 20 Smoothie Recipes for Picky Eaters
- Pour the smoothie into a plastic bag or squeeze bottle for easy piping.
- Drop small, coin-sized pieces onto a parchment-lined baking tray.
- Freeze for 1–2 hours, or until fully frozen.
These melts are best enjoyed straight from the freezer since they soften quickly at room temperature.
Tips for Serving Smoothie Melts
Smoothie melts don’t just have to be a grab-and-go snack! They pair great with other foods for a more well-rounded meal or larger snack.
- Pair with a protein source: they pair great with a protein like nuts, a cheese stick, or jerky. Having trouble getting your picky eater to eat protein? Check out my full guide on protein for picky eaters here
- In a snack mix: Add them to a homemade snack mix with cereals, nuts (if age-appropriate), seeds, or dried fruit for a fun and nutrient-packed option.
- As part of a meal: Include them on the side of a meal along with a protein source (like chicken, turkey, or yogurt) and a carbohydrate (such as crackers, toast, or rice).
Smoothie melts are a convenient, nutritious, and versatile snack that can easily fit into your child’s diet. They offer a simple way to boost nutrient intake, introduce new flavors and textures, and support developmental milestones like self-feeding.
If you enjoyed this guide, don’t forget to subscribe to my newsletter for more kid-friendly snack ideas, healthy recipes, and recommendations tailored to busy families.
This post may contain affiliate links, meaning I will receive a commission if you decide to make a purchase through my links, at no cost to you. For more information, please read my Terms of Use and Service. This post is sponsored by Amara. All opinions and recommendations are my own.
